Create a Signup Form
Home /Knowledgebase / Create a Signup Form
You can create signup forms that you can put on your Website, Blog, Facebook page, Twitter profile or pretty much anywhere else. Here's how you do it...
- Click on the "Signup Forms" link on the left of the SEMSblast Control Panel.
- Click the ADD A NEW FORM button.
- Enter a friendly name for your form. This is just for your reference.

- Select the group that you would like people who subscribe usign this form to go into...

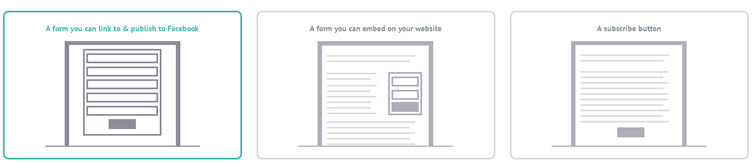
- You now have three options as to what type of form to create...
Types of Form
Hosted Form
Hosted forms are forms that are hosted on SEMSblast servers that can simply be linked to from anywhere. Your website, your blog, your Facebook page, a magazine ad, etc.
- Click "A form you can link to and publish to Facebook"
- Your form will be created and you are now able to customise the look of the form and the data fields you would like to capture.
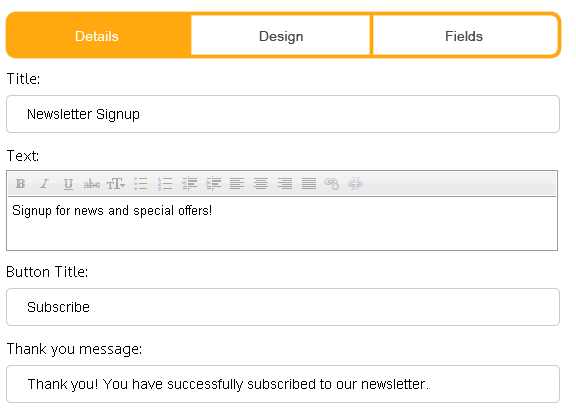
- The first part of designing your form is the "Details" section.
Here you can enter a title for your form, some text that goes underneath the title, and the text that appears on your button.
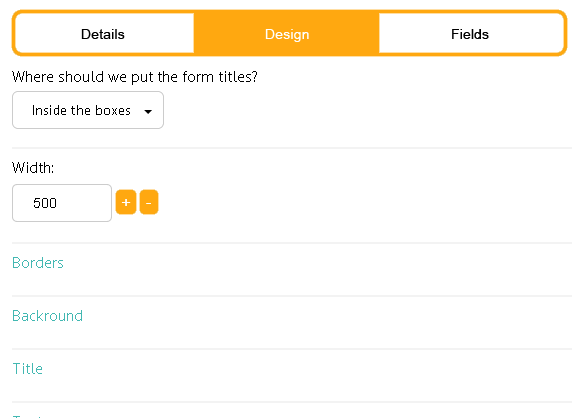
- Next is the "Design" section. Here you can adjust the width of your form as well as the colours, fonts, text sizes and much more.
- Next the "Fields" tab allows you to adjust the fields that you are capturing from your subscribers.
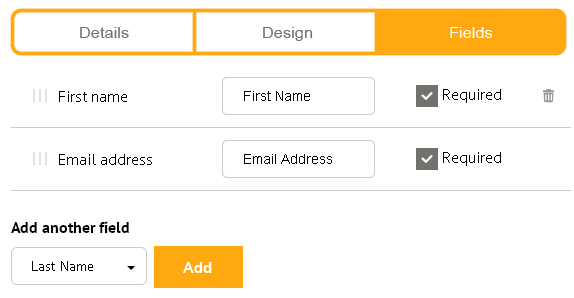
Here you can add new fields from the list at the bottom of the page. You can also type a field name next to each field. You can tick to make the field required, or you can delete the field by clicking the trash can.
You can also re-order the fields by clicking and holding the "Drag" button on the left of each field, and dragging the fields around. - When you are happy with your form, click the SAVE button at the bottom right of the page.
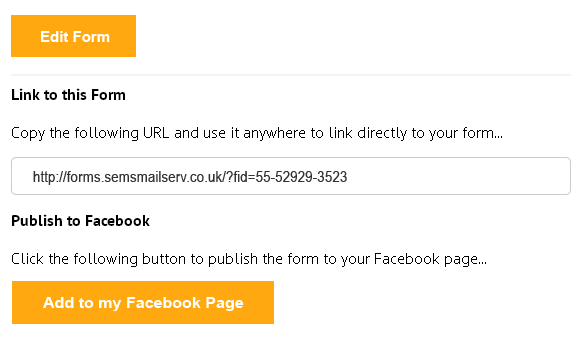
- You can now choose to re-edit your form with the "EDIT FORM" button at the top of the page.
There is also a section called "Link to this form". Here you can copy and paste a direct link to your form and use that link anywhere.
The final option is "Add to my Facebook page" If you click this you will be taken to Facebook where you will be able to automatically add the form to any Facebook pages you have created.
- Now we want to create a confirmation email that is sent to the user when they signup to your list via this form.
Click the "Confirmation Email" link at the top of the page.

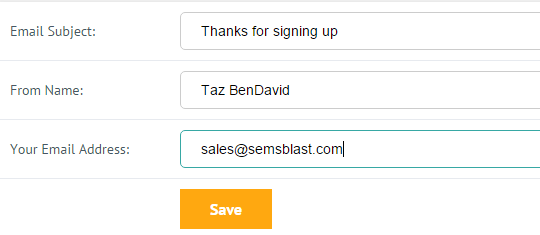
- Enter an Email Subject, a from name and the email address you would like the email to come from, then click save.
- Click the EDIT button next to the email preview to edit the newsletter that is sent using the ezCreator email designer.
- Once you are finished editting your email, click the "Confirmation Page" link at the top of the page.

- This area enables you to design a landing page that your user is sent to once they have finished signing up to your list. Click the EDIT button to edit your form using the ezCreator designer.
Embedded Form
Embedded forms are forms you can place on your website or blog that are hosted on your site and can be fitted into your site design perfectly.
- Click "A form you can embed on your website"
- Your form will be created and you are now able to customise the look of the form and the data fields you would like to capture.
- The first part of designing your form is the "Details" section.
Here you can enter a title for your form, some text that goes underneath the title, and the text that appears on your button.
- Next is the "Design" section. Here you can adjust the width of your form as well as the colours, fonts, text sizes and much more.
- Next the "Fields" tab allows you to adjust the fields that you are capturing from your subscribers.
Here you can add new fields from the list at the bottom of the page. You can also type a field name next to each field. You can tick to make the field required, or you can delete the field by clicking the trash can.
You can also re-order the fields by clicking and holding the "Drag" button on the left of each field, and dragging the fields around. - When you are happy with your form, click the SAVE button at the bottom right of the page.
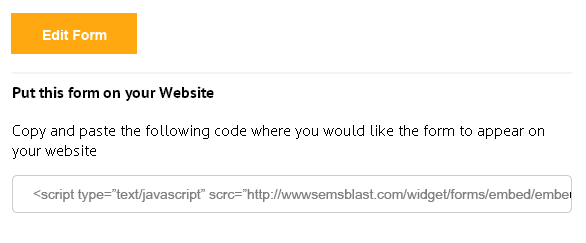
- You can now choose to re-edit your form with the "EDIT FORM" button at the top of the page.
There is also a section called "Put this form on your website". All you need to do here is copy the HTML code out of the box, and paste it into your Website's source code wherever you want it to appear.
- Now we want to create a confirmation email that is sent to the user when they signup to your list via this form.
Click the "Confirmation Email" link at the top of the page.
- Enter an Email Subject, a from name and the email address you would like the email to come from, then click save.
- Click the EDIT button next to the email preview to edit the newsletter that is sent using the ezCreator email designer.
- Once you are finished editting your email, click the "Confirmation Page" link at the top of the page.
- This area enables you to design a landing page that your user is sent to once they have finished signing up to your list. Click the EDIT button to edit your form using the ezCreator designer.
Popup Form
Popup forms are similair to embedded forms in that you can embed them straight onto your website to fit perfectly with your website design, however popup forms consist of a single button that appears on your website, perhaps saying "Newsletter Signup". When a user clicks on the button your form appears in a popup superimposed on to of your site.
- Click "A subscriber button"
- Your button will be created and you are now able to customise the look and feel of the button.
- You can enter the title of your button, adjust the width, and adjust the look and feel of the button using the following options.

- When you are happy with your button, click the SAVE button at the bottom right of the page.
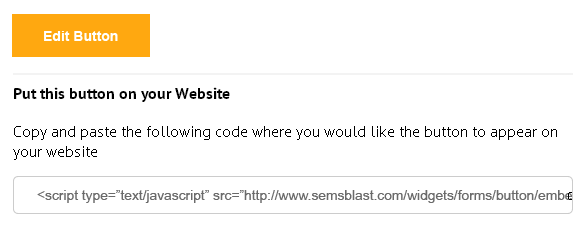
- You can now choose to re-edit your button with the "EDIT BUTTON" button at the top of the page.
There is also a section called "Put this button on your website". All you need to do here is copy the HTML code out of the box, and paste it into your Website's source code wherever you want it to appear.
- You can now customise the look of the form that pops up when the button is clicked, and the data fields you would like to capture.
- The first part of designing your form is the "Details" section.
Here you can enter a title for your form, some text that goes underneath the title, and the text that appears on your button.
- Next is the "Design" section. Here you can adjust the width of your form as well as the colours, fonts, text sizes and much more.
- Next the "Fields" tab allows you to adjust the fields that you are capturing from your subscribers.
Here you can add new fields from the list at the bottom of the page. You can also type a field name next to each field. You can tick to make the field required, or you can delete the field by clicking the trash can.
You can also re-order the fields by clicking and holding the "Drag" button on the left of each field, and dragging the fields around. - When you are happy with your form, click the SAVE button at the bottom right of the page.
- Now we want to create a confirmation email that is sent to the user when they signup to your list via this form.
Click the "Confirmation Email" link at the top of the page.
- Enter an Email Subject, a from name and the email address you would like the email to come from, then click save.
- Click the EDIT button next to the email preview to edit the newsletter that is sent using the ezCreator email designer.
- Once you are finished editting your email, click the "Confirmation Page" link at the top of the page.
- This area enables you to design a landing page that your user is sent to once they have finished signing up to your list. Click the EDIT button to edit your form using the ezCreator designer.