Adding an Auto Responder
Adding an Auto-Responder which sends automatic emails out to your customers on a schedule, is a pretty simple experience.
Here's how it's done...
Step 1:
Before you begin, you must make sure you are logged in to the SEMSblast control panel. If you don't already have an account you can create a free account.
Step 2:
Click the Automation tab at the top of the SEMSblast Control Panel

Step 3:
Click the Create Automation button located at the top right of the screen

Step 4:
You will now be taken into the Automation Designer. The first thing to do before you can start adding Steps is to choose which subscribers are added to your automation, and when.
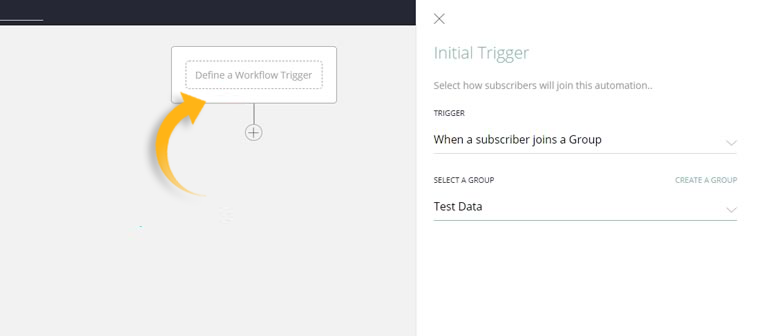
Click the "Define a Workflow Trigger" box that is in the middle of your screen. A drawer will open to the right allowing you to select when subscribers are added to your automation. For now select "When a subscriber joins a group" and then either pick an existing group, or create a new one.
Click the "Save" button when done.
Step 5:
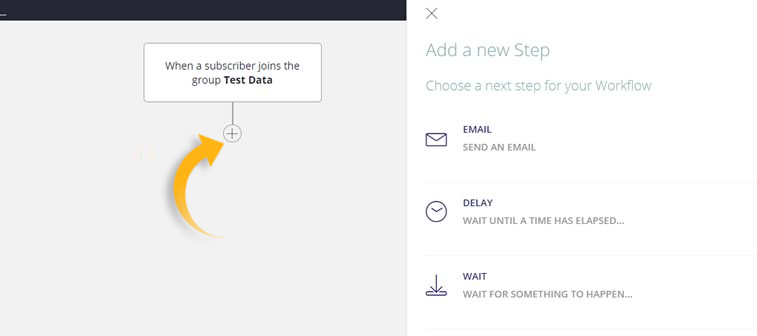
Now that you have setup the initial "Trigger" you can go ahead and add steps to your automation. For our example we are going to send an email, so click the little "+" button just below the "Initial Trigger" box to add a new step, and then select "Email" to add an email step.
Step 6:
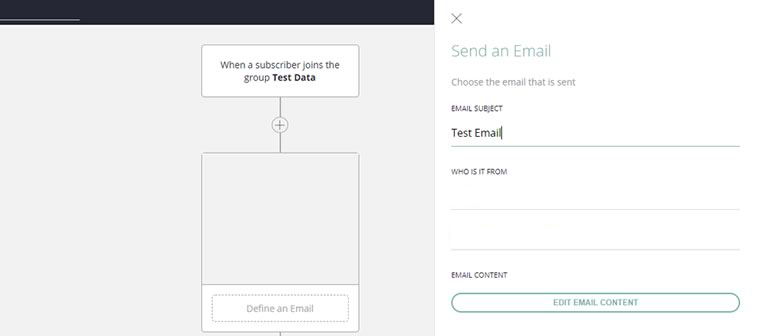
You should now see the "Drawer" on the right has changed and is now showing options to do with your new email. Enter a subject, a sender name and a sender email address and then click the "Edit Email Content" button.
You will be taken off to select and edit an email template. Once done you will be sent back to the automation designer and your email step will be ready to go.
Note: You can always edit or adjust steps by simply clicking on them.
Step 7:
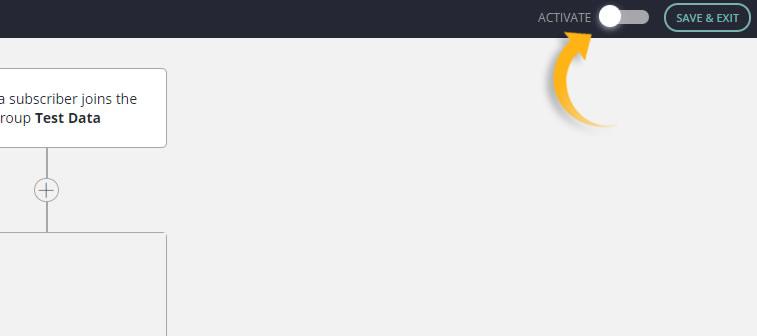
You could carry on adding steps, and making your workflow as simple or as complicated as you wish. In our example we are happy to simply send an email to subscribers when they join our group, so lets make the automation live. Simply click the toggle at the top right of the screen that says"Activate" to switch on your automation.
You're Automated!
Congratulations, you setup your first automation. You can now explore all of the combinations of options available, and start setting up automations for pretty much any purpose.
Now your automation is live you might have noticed the screen looks a little different, some new icons have appeared.
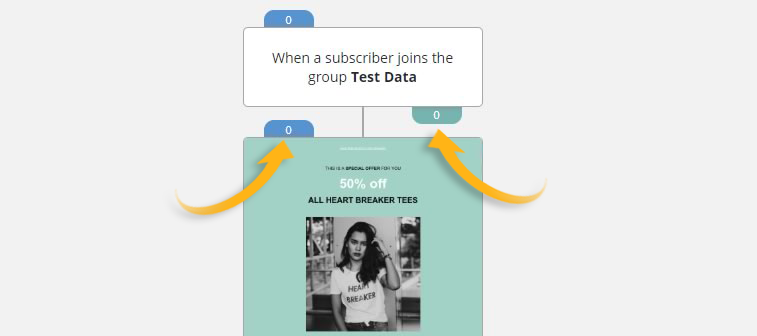
The blue icon at the top of each box shows the number of subscribers that are queued up and waiting to be processed by the step, and the green icon underneath shows the number of subscribers that have already been processed by this step.
These stats update in real time so you can sit back and watch as subscribers travel around your automation.
You can also click on any step to get in depth statistics about who's waiting, who's been processed and more.
Finally, you can pause and edit your automation at any time by simply clicking the "Pause" button located at the top right of the screen (it only shows up if the automation is actually live!)
Happy Auto Responder!


